


Hey there! I'm a supplier of mini trampolines, and I know that assembling one can seem like a bit of a head-scratcher at first. But don't worry, I'm here to walk you through the whole process step by step. Whether you've just bought a 40-inch Folding Smiling Trampoline, a Fun House Mini Trampoline, or a Small Trampoline for Kids, the basic assembly principles are pretty much the same.
Getting Ready
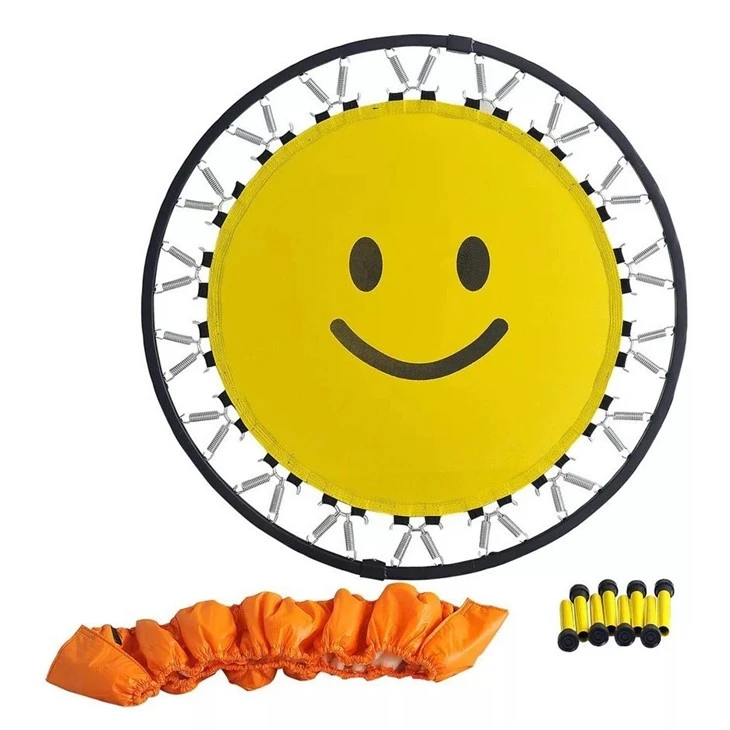
First things first, you gotta gather all the tools and parts you'll need. Usually, your mini trampoline will come with a tool kit that includes wrenches and maybe a few other small tools. Make sure you've got all the parts laid out in front of you. You should have the frame pieces, the jumping mat, the springs, and any safety pads or handles that are included. It's a good idea to check the instruction manual that comes with your trampoline to make sure you've got everything.
Find a flat and open space to work in. You don't want to be trying to assemble the trampoline on an uneven surface or in a cramped area. A garage or a backyard with plenty of room is perfect. Also, if you're not super confident in your DIY skills, it might be a good idea to get a friend or family member to help you out. Two heads are better than one, right?

Assembling the Frame
Let's start with the frame. Most mini trampolines have a frame that's made up of several sections. Look for the connectors or joints that will fit the sections together. Usually, these are pretty easy to spot. Some frames might have a snap-together design, while others might require you to use the wrenches from the tool kit to tighten bolts.
Start by laying out the frame sections in the shape of the trampoline. Then, connect the sections one by one. Make sure each connection is secure. If you're using bolts, don't just tighten them a little bit. You want to make sure they're really tight so that the frame is stable. Once you've connected all the sections, give the frame a little shake to make sure it's not wobbly. If it is, go back and check the connections to see if you need to tighten anything.
Attaching the Jumping Mat
Now it's time to attach the jumping mat. This can be a bit of a tricky step, but with a little patience, you'll get it done. First, find the holes or loops around the edge of the jumping mat. These are where the springs will attach.
Take one end of a spring and hook it onto the frame. Then, stretch the spring over to the corresponding hole or loop on the jumping mat and hook it on there. You might need to use a spring hook tool (which should be in the tool kit) to make it easier to stretch the springs. Start at one point on the mat and work your way around the perimeter, attaching the springs one by one.
It's important to make sure the mat is centered on the frame and that the springs are evenly spaced. If the mat is off-center, it could affect the way the trampoline bounces. As you're attaching the springs, check to see if the mat is pulling evenly. If one side seems to be tighter than the other, you might need to adjust the springs to even it out.
Adding Safety Features
Once the jumping mat is attached, it's time to add any safety features that your trampoline has. This could include safety pads that go around the frame to protect you from hitting the metal, or handles that you can hold onto while you're jumping.
If you're adding safety pads, they usually just slip over the frame. Make sure they fit snugly and cover all the parts of the frame that you could potentially hit. If there are any Velcro straps or ties, use them to secure the pads in place.
For handles, you'll need to find the mounting points on the frame. These are usually pre-drilled holes. Use the bolts and nuts from the tool kit to attach the handles to the frame. Make sure the handles are secure and that they're at a comfortable height for you to hold onto.
Final Checks
Before you start jumping on your brand-new mini trampoline, it's important to do a final check. Give the frame another shake to make sure it's still stable. Check all the connections again to make sure nothing has come loose during the assembly process.
Inspect the jumping mat to make sure there are no tears or holes. Also, check the springs to make sure they're all securely attached and that none of them are broken. If you find any problems, don't use the trampoline until you've fixed them.
Tips and Tricks
Here are a few tips to make the assembly process even easier. When you're attaching the springs, it can be helpful to have someone hold the mat in place while you stretch the springs. This makes it a lot easier to get the springs hooked on.
If you're having trouble stretching the springs, try using a pair of pliers to get a better grip. Just be careful not to damage the springs or the mat.
And remember, if you get stuck at any point, don't hesitate to refer back to the instruction manual. It's there for a reason!
Why Choose Our Mini Trampolines
Now, I know there are a lot of mini trampoline suppliers out there, but let me tell you why you should choose ours. Our trampolines are made from high-quality materials. The frames are strong and durable, and the jumping mats are designed to last. We also offer a wide range of styles and sizes to choose from, so you can find the perfect trampoline for your needs.
Whether you're looking for a small trampoline for your kids to play on in the backyard or a larger one for some adult exercise, we've got you covered. And if you have any questions about the assembly process or about our products in general, our customer service team is always here to help.
Contact Us for Purchasing
If you're interested in purchasing one of our mini trampolines or if you have any questions about the products, we'd love to hear from you. Just reach out to us, and we'll be happy to assist you with any purchasing inquiries. Whether you're a retailer looking to stock our products or an individual looking for a fun and safe trampoline for your home, we're here to make the process as easy as possible for you.
References
- Instruction manuals provided with the mini trampolines.
- General knowledge of mini trampoline assembly based on experience as a supplier.


