


Installing a 1.4m trampoline with a net might seem like a daunting task at first, but with the right guidance, it can be a straightforward and rewarding experience. As a supplier of 1.4m trampolines with nets, I've witnessed firsthand the joy these trampolines bring to families. In this blog post, I'll walk you through the step-by-step installation process, ensuring that you can set up your trampoline safely and efficiently.
Step 1: Choose the Right Location
The first and most crucial step in installing your 1.4m trampoline with a net is selecting the perfect location. You want to pick an area that is flat, level, and free from any obstacles such as trees, fences, or sharp objects. A flat surface is essential to ensure the stability of the trampoline and prevent any uneven bouncing. Additionally, make sure the area has enough clearance around it to accommodate the net and provide a safe space for users to jump.
Step 2: Gather Your Tools and Materials
Before you begin the installation process, it's important to gather all the necessary tools and materials. Here's a list of what you'll typically need:
- A rubber mallet
- A wrench or socket set
- A Phillips head screwdriver
- The trampoline frame parts
- The jumping mat
- The springs
- The net enclosure
- The poles for the net
- The instructions manual
Having all these items ready will make the installation process much smoother and more efficient.
Step 3: Assemble the Trampoline Frame
Start by laying out all the frame parts on the ground. Refer to the instructions manual to identify each part and ensure you have everything you need. Begin by connecting the frame sections together using the provided bolts and nuts. Use the wrench or socket set to tighten the connections securely. Make sure the frame is assembled in a circular shape and that all the joints are properly aligned.
Once the frame is assembled, place it in the chosen location. Check again to ensure that the ground is level and that the frame is stable. You may need to adjust the position of the frame slightly to make it perfectly centered.
Step 4: Attach the Jumping Mat
Next, it's time to attach the jumping mat to the frame. Lay the jumping mat in the center of the frame and align the holes on the mat with the holes on the frame. Start by attaching the springs to one side of the mat and the corresponding holes on the frame. Use the rubber mallet to help you stretch the springs and hook them onto the frame. Work your way around the mat, attaching the springs one by one until all the springs are in place.
Make sure the springs are evenly spaced and that the mat is taut. A loose mat can affect the performance of the trampoline and increase the risk of injury. If you encounter any difficulties attaching the springs, refer to the instructions manual or seek assistance from a professional.
Step 5: Install the Net Enclosure
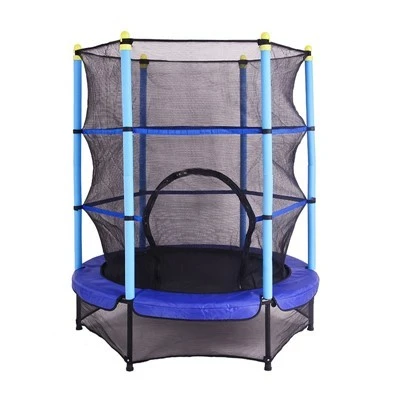
The net enclosure is an important safety feature that helps prevent users from falling off the trampoline. Start by assembling the poles for the net according to the instructions. Once the poles are assembled, insert them into the sockets on the frame. Make sure the poles are securely in place and that they are evenly spaced around the frame.
Next, attach the net to the poles. Most nets come with a zippered opening for easy access. Start by attaching the top of the net to the poles using the provided clips or ties. Work your way down the net, attaching it to the poles until the entire net is in place. Make sure the net is taut and that there are no gaps or loose areas.
Step 6: Secure the Net Enclosure
To ensure the net enclosure is secure, it's important to use the provided straps or ropes to tie it down to the frame. This will prevent the net from shifting or coming loose during use. Follow the instructions in the manual to properly secure the net.
Step 7: Final Checks
Once the trampoline is fully assembled, it's time to perform a final check to ensure everything is in place and secure. Check all the bolts, nuts, and springs to make sure they are tightened properly. Inspect the net enclosure for any tears or damage. Make sure the zipper on the net is working smoothly and that the entrance is easy to open and close.
Before allowing anyone to use the trampoline, test it out yourself to make sure it bounces properly and that the net provides adequate protection. If you notice any issues or concerns, address them immediately before using the trampoline.
Conclusion
Installing a 1.4m trampoline with a net may seem like a complex task, but by following these steps and referring to the instructions manual, you can successfully set up your trampoline in no time. Remember to always prioritize safety and make sure the trampoline is installed on a flat, level surface away from any hazards.
If you're interested in purchasing a 1.4m trampoline with a net or other types of trampolines, such as the Big Backyard Trampoline, Big Outdoor Trampoline, or 55 Inch Kids Trampoline, feel free to contact us to discuss your needs and explore our range of products. We're here to help you find the perfect trampoline for your family and ensure a safe and enjoyable jumping experience.

References
- Trampoline installation guide provided by the manufacturer.
- Safety guidelines for trampoline use.


