


When it comes to providing endless fun and a great way to stay active for kids, a 6FT trampoline is an excellent choice. As a supplier of 6FT Trampolines for Kids, I understand the importance of not only having a high - quality trampoline but also knowing the right tools to assemble it properly. In this blog, I'll walk you through the essential tools needed to assemble a 6FT trampoline for kids, ensuring a safe and enjoyable experience for your little ones.
Basic Hand Tools
First and foremost, you'll need a set of basic hand tools. A good set of adjustable wrenches is a must - have. These wrenches come in handy when tightening nuts and bolts of different sizes. You'll encounter various fasteners during the assembly process, and an adjustable wrench allows you to handle them all without the need for multiple fixed - size wrenches. For example, when attaching the legs of the trampoline to the frame, you'll use the wrench to secure the bolts tightly. This ensures the stability of the entire structure, preventing any wobbling or movement that could pose a safety risk to the kids using the trampoline.
A Phillips - head screwdriver is another essential tool. Many trampoline parts are assembled using Phillips - head screws. For instance, the padding that covers the springs and frame often uses these screws for attachment. The padding is crucial as it protects kids from getting pinched by the springs or hitting the hard frame. A well - fitting and securely attached padding can significantly reduce the risk of injuries.
In addition to the Phillips - head screwdriver, a flat - head screwdriver can also be useful. There might be some small parts or components that require a flat - head screwdriver for assembly or adjustment. It can also be used to pry open packaging or remove small clips if necessary.
Power Tools (Optional but Helpful)
While you can assemble a 6FT trampoline for kids using only hand tools, power tools can make the process much faster and easier. A cordless drill with a Phillips - head bit can be a game - changer. Instead of manually turning the screwdriver for each screw, the drill can quickly drive the screws into place. This is especially useful when there are a large number of screws, such as when attaching the jumping mat to the frame. The drill can save you a significant amount of time and effort, allowing you to complete the assembly in a shorter period.
However, if you choose to use a power drill, make sure to set it to the appropriate torque setting. Over - tightening the screws can damage the trampoline parts, while under - tightening can lead to a loose and unstable structure.
Spring Tools
Springs are a vital part of a trampoline, as they provide the bounce. To attach the springs to the frame and the jumping mat, you'll need a spring tool. A spring puller is a common type of spring tool. It allows you to stretch the springs and hook them onto the frame and mat easily. Springs can be quite strong and difficult to stretch by hand, so a spring puller is essential for a smooth assembly process.
When using a spring puller, make sure to follow the instructions carefully. Improper use can cause the spring to snap back, which can be dangerous. Also, ensure that all the springs are evenly attached and have the same tension. Unevenly tensioned springs can cause the jumping mat to be uneven, affecting the bounce and increasing the risk of injuries.
Measuring Tools
Accuracy is key when assembling a trampoline. A tape measure is a simple yet important tool. You'll need it to ensure that the trampoline is assembled to the correct dimensions. For example, when setting up the frame, you need to make sure that the legs are evenly spaced and the frame is the right size. Measuring the distance between the legs and the overall diameter of the frame can help you achieve a proper and stable assembly.
A level can also be useful, especially when setting up the trampoline on a flat surface. It helps you ensure that the trampoline is perfectly horizontal. An uneven trampoline can cause kids to fall off more easily and can also put additional stress on the frame and springs, reducing their lifespan.
Safety Equipment
While not strictly assembly tools, safety equipment is essential during the assembly process. Safety glasses protect your eyes from any flying debris, such as small metal shavings or pieces of plastic that might break off during the assembly. Gloves can also be useful, especially when handling sharp edges or heavy parts. They provide a better grip and protect your hands from cuts and bruises.
Assembly Process and Tool Usage
Let's briefly go through the assembly process and how each tool is used. First, you'll start by laying out all the parts and organizing them. Use the tape measure to check the dimensions of the frame parts and ensure they are correct. Then, use the adjustable wrenches to assemble the frame by tightening the bolts.
Next, attach the legs to the frame using the wrenches. Make sure the legs are firmly attached and evenly spaced. Once the frame is assembled, use the spring puller to attach the springs to the frame. Start from one side and work your way around, ensuring that each spring is evenly tensioned.
After attaching the springs, use the Phillips - head screwdriver or drill to attach the jumping mat to the springs. Make sure the mat is centered and evenly attached. Finally, use the screwdriver to attach the padding to the frame, covering the springs and providing a safe surface for the kids to jump on.

Other Trampoline Options
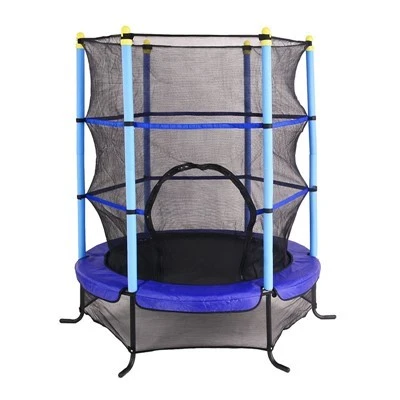
If you're interested in other trampoline options, we also offer a Big Round Trampoline, which provides a larger jumping area for more kids to enjoy together. Our 55 Inch Kids Trampoline is a great choice for smaller spaces or younger kids. And for those who prefer a square shape, our 8ft Trampoline Square offers a unique and stable jumping experience.
Conclusion
Assembling a 6FT trampoline for kids requires a combination of basic hand tools, power tools (optional), spring tools, measuring tools, and safety equipment. By having the right tools and following the assembly instructions carefully, you can ensure a safe and enjoyable trampoline for your kids.
If you're interested in purchasing a 6FT trampoline for kids or any of our other trampoline products, we encourage you to reach out to us for a procurement negotiation. We're committed to providing high - quality products and excellent customer service.
References
- Trampoline Assembly Guides provided by industry standards
- Experience from assembling numerous 6FT trampolines for kids


